Table of Contents
What is Keycloak Client ?
- As per the official keycloak definition of clients. Clients are entities that can request Keycloak to authenticate a user. Most often, clients are applications and services that want to use Keycloak to secure themselves and provide a single sign-on solution.
- Clients can also be entities that just want to request identity information or an access token so that they can securely invoke other services on the network that are secured by Keycloak. Clients in keycloak are the applications which we want to secure.
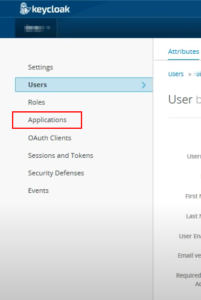
- In inital days of keycloak, there was no option in keycloak GUI as clients, it was named as Applications. Later the application got renamed to client. In this article, we will see the usage of client and importance of Client Roles by a sample ReactJS application.
- Below screen capture shows legacy Keycloak GUI
What is Keycloak Client Role?
- Keycloak client roles, can be considered as power given for the users by the application. There will be some resources in an application that should be accessible to every login user, this authorization of the user whether it have right access to use the resource, can be achieved by using client role.
- For example in a company employees compensation should be only accessible to the manager and not other employees, this can be achieved by creating role for the user as manager
- The client role can be assigned to users in the realm by creating a Role Mapping
- There are different Role available in keycloak. In this article, we will be only talking about client role and not Realm role
Setup Details
- Rocky Linux 8 VM on VirtualBox
- RAM 4 GB
- 2 VCPUs
- 23 GB HD
- Host OS: Windows 10
Pre-Requisites
- keycloak should be installed and running
- A new realm (linux-data-hub) should be created
- Application url (with port) where Sample ReactJS application is running should be known
- yarn should be installed in the machine. We will using this for running the sample ReactJS server
Create Client
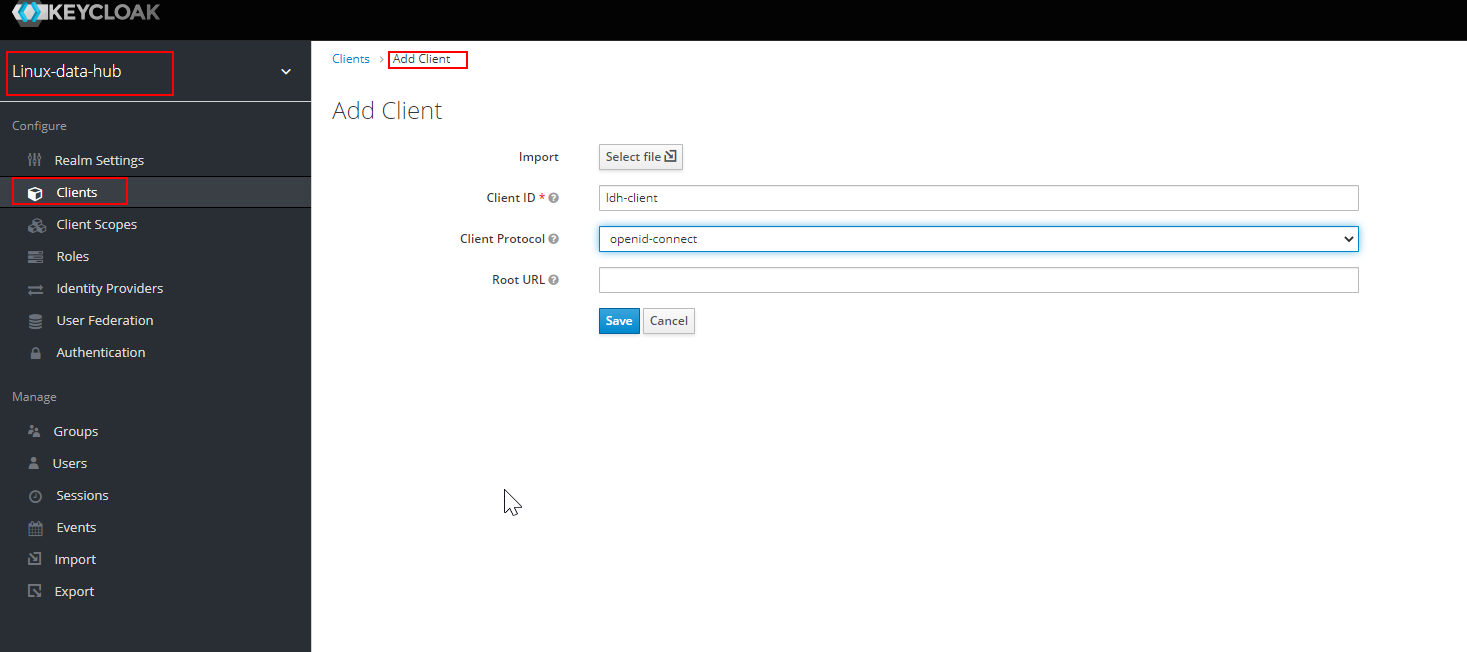
- Navigate to the newly created Realm, Click on clients → Add client . Below screen capture shows the same
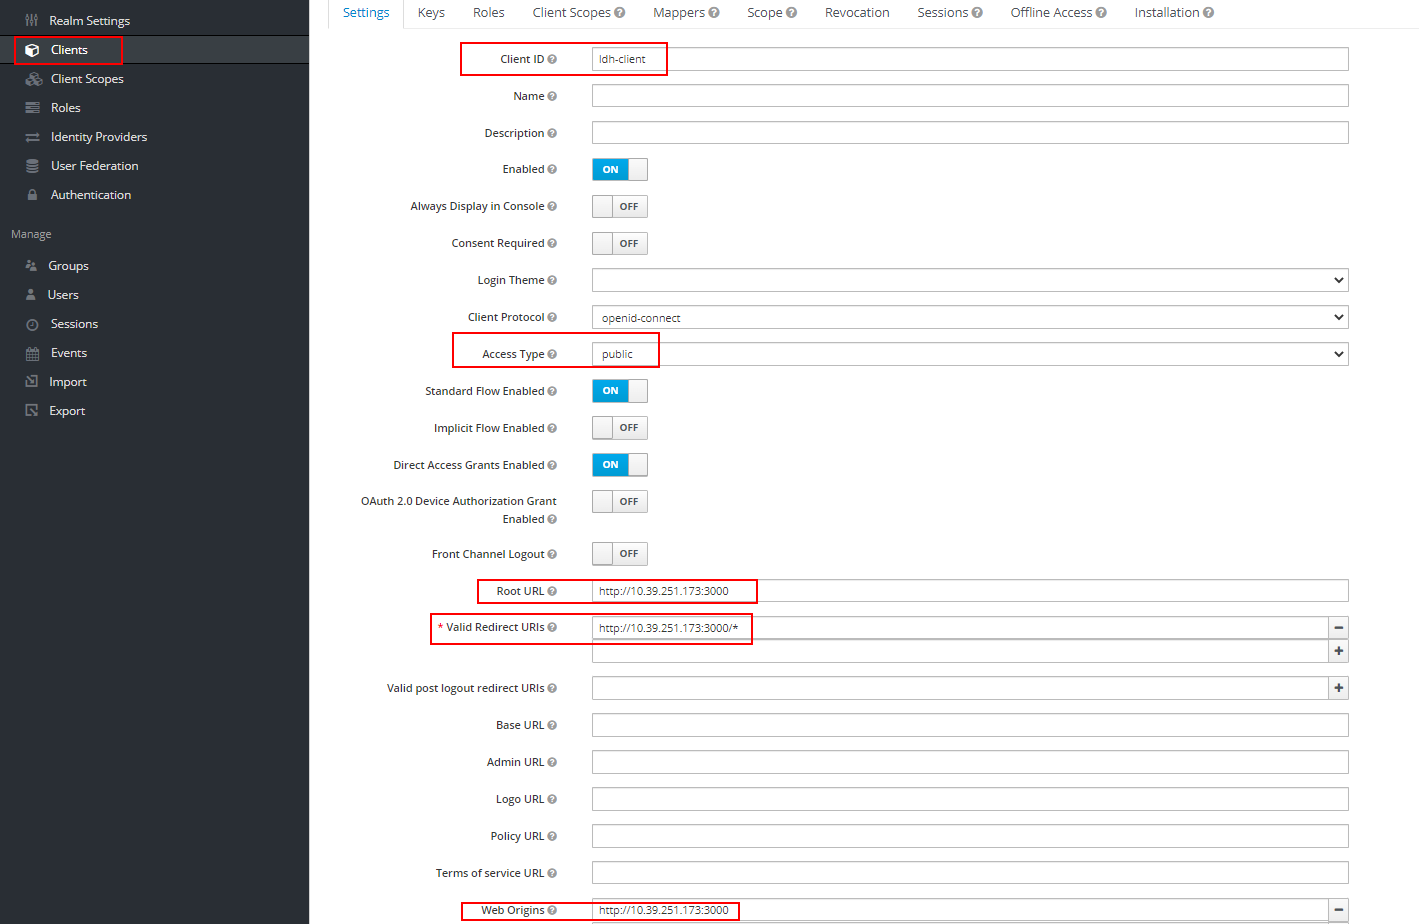
- For the sake of this article, we are going to keep the access type of the client as public
- Root URL, Valid Redirect URIs, Web Origins need to be filled with applications urls,
- Below screen shot shows the same, as mentioned in the pre-requiste, we should have/know the details of the application (application url)
Setting up Sample Application
- We will be using a sample application written by motnip
- Clone the github repository to your machine
- Fetch installation details of the client from the keycloak server
- Navigate to clients → Select the client (ldh-client) → Installation → From drop down Select Keycloak OIDC JSON
- Navigate to the public directory of the cloned repo and update the keycloak.json file with the content we got from above step. This step is for configuring keycloak details to the application
[root@3vcpu-2 public]# cat ~/keycloak-js-login/public/keycloak.json
{
"realm": "linux-data-hub",
"auth-server-url": "http://10.39.251.173:8080/",
"ssl-required": "external",
"resource": "ldh-client",
"public-client": true,
"verify-token-audience": true,
"use-resource-role-mappings": true,
"confidential-port": 0
}
- Navigate to the cloned directory where package.json is present and execute "yarn start" . This will start our sample application server
[root@3vcpu-2 keycloak-js-login]# pwd
~/keycloak-js-login
[root@3vcpu-2 keycloak-js-login]# ll
total 636
-rw-r--r--.    1 root root    196 Oct  8 21:28 docker-compose.yml
drwxr-xr-x. 1050 root root  36864 Oct  8 21:37 node_modules
-rw-r--r--.    1 root root    881 Oct  8 21:28 package.json
drwxr-xr-x.    2 root root   4096 Oct  9 14:50 public
-rw-r--r--.    1 root root   3509 Oct  8 21:28 README.md
-rw-r--r--.    1 root root  67544 Oct  8 21:28 realm-keycloak-tutorial.json
drwxr-xr-x.    2 root root   4096 Oct  8 21:28 src
-rw-r--r--.    1 root root 522632 Oct  8 21:28 yarn.lock
[root@3vcpu-2 keycloak-js-login]#
[root@3vcpu-2 keycloak-js-login]# yarn start
yarn run v1.22.19
$ react-scripts start
ℹ 「wds」: Project is running at http://10.39.251.173/
ℹ 「wds」: webpack output is served from
ℹ 「wds」: Content not from webpack is served from /home/stack/keycloak-js-login/public
ℹ 「wds」: 404s will fallback to /
Starting the development server...
- Access the ReactJS App via port 3000, we will able to see a home page
Application walkthrough
- As seen in the above screen shot, there are four pages available for the application
- Welcome page, and Public page doesnt need the user to be logged in
- Manager page and User Details page utilizes keycloak for authentication this can be seen in their code
Manager.JS
- Below code snippet is taken from the git repository which we are using for our sample application
- It can be seen that the UseKeycloak is imported, which will carry out the authentication against keycloak server
- Authentication will succeed, if the user name and password is correct
- For Authorization, from the code Point of view. The user should have a role manager to it
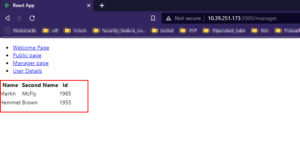
- Once Authentication and Authorization is successful, some dummy user info will be shown in the GUI
[root@3vcpu-2 src]# cat Manager.js
import React from 'react'
import useKeyCloak from './UseKeyCloak';

function Manager() {
const keycloak = useKeyCloak();

return (
<div>
{keycloak && keycloak.hasResourceRole("manager") && (
<div>
<div>
<table>
<tr>
<th>Name</th>
<th>Second Name</th>
<th>Id</th>
</tr>
<tr>
<td>Martin</td>
<td>McFly</td>
<td>1985</td>
</tr>
<tr>
<td>Hemmet</td>
<td>Brown</td>
<td>1955</td>
</tr>
</table>
</div>

</div>)
}
{(!keycloak || !keycloak.hasResourceRole("manager")) && <div>Access denied. You don't have right to access this page.</div>}
</div>
)
}
export default Manager
UserDetails.js
- It can be seen that the UseKeycloak is imported, which will carry out the authentication against keycloak server
- Authentication will succeed, if the user name and password is correct
- For Authorization, from the code Point of view. The user should have either role manager or user to it
[root@3vcpu-2 src]# cat UserDetails.js
import useKeyCloak from './UseKeyCloak';
import UserInfo from './UserInfo';
import Logout from './Logout';
import React, { useEffect } from 'react';

export default function UserDetails() {
const keycloak = useKeyCloak();

return (

<div>
{keycloak && (keycloak.hasResourceRole("manager") || keycloak.hasResourceRole("user")) && (<div>
<div>loggin succeed</div>
<div> <UserInfo keycloak={keycloak} /></div>
<div><Logout keycloak={keycloak} /></div>
</div>
)}
{keycloak && !keycloak.authenticated &&
(<div><a onClick={() => keycloak.login()}>Login</a></div>)
}
</div>

)
}
Create Client Role
- We need to create Roles in Clients, so that the application can utilize this role and to identify, the authenticated user is having authorization for accessing the resources
- For our sample application we will have to create two client roles "manager" and "user"
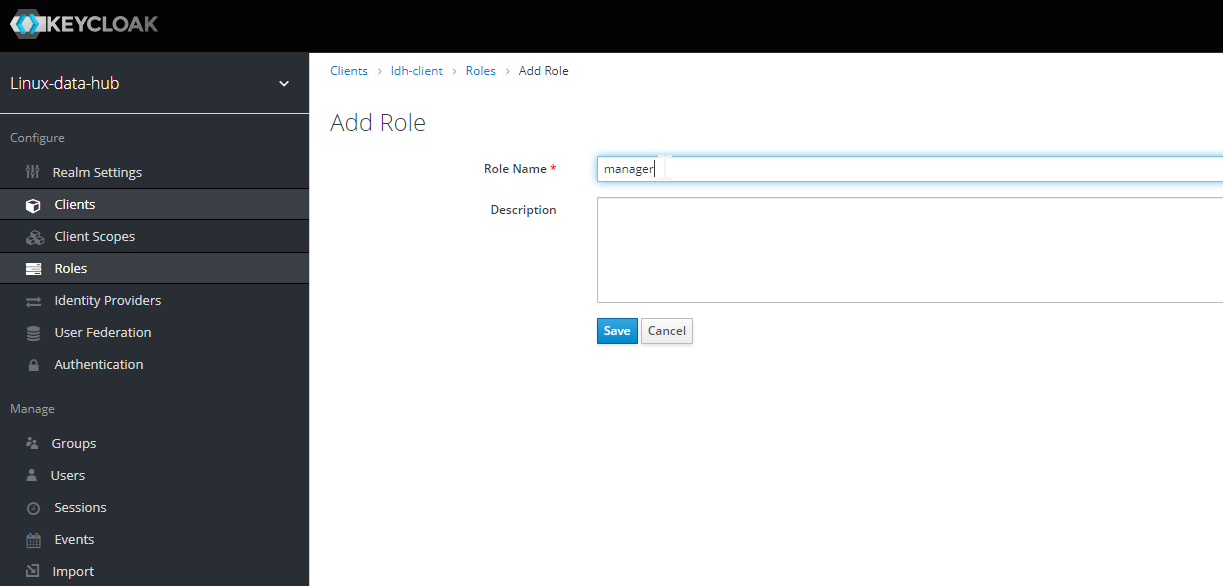
- Navigate to clients → Select the client (ldh-client) → Roles → Add Role
- Add role named manager and user
- Once both roles are created, the roles can be viewed as below
Assign Role Mapping
- User created in the realm need to be mapped with client Role Mapping
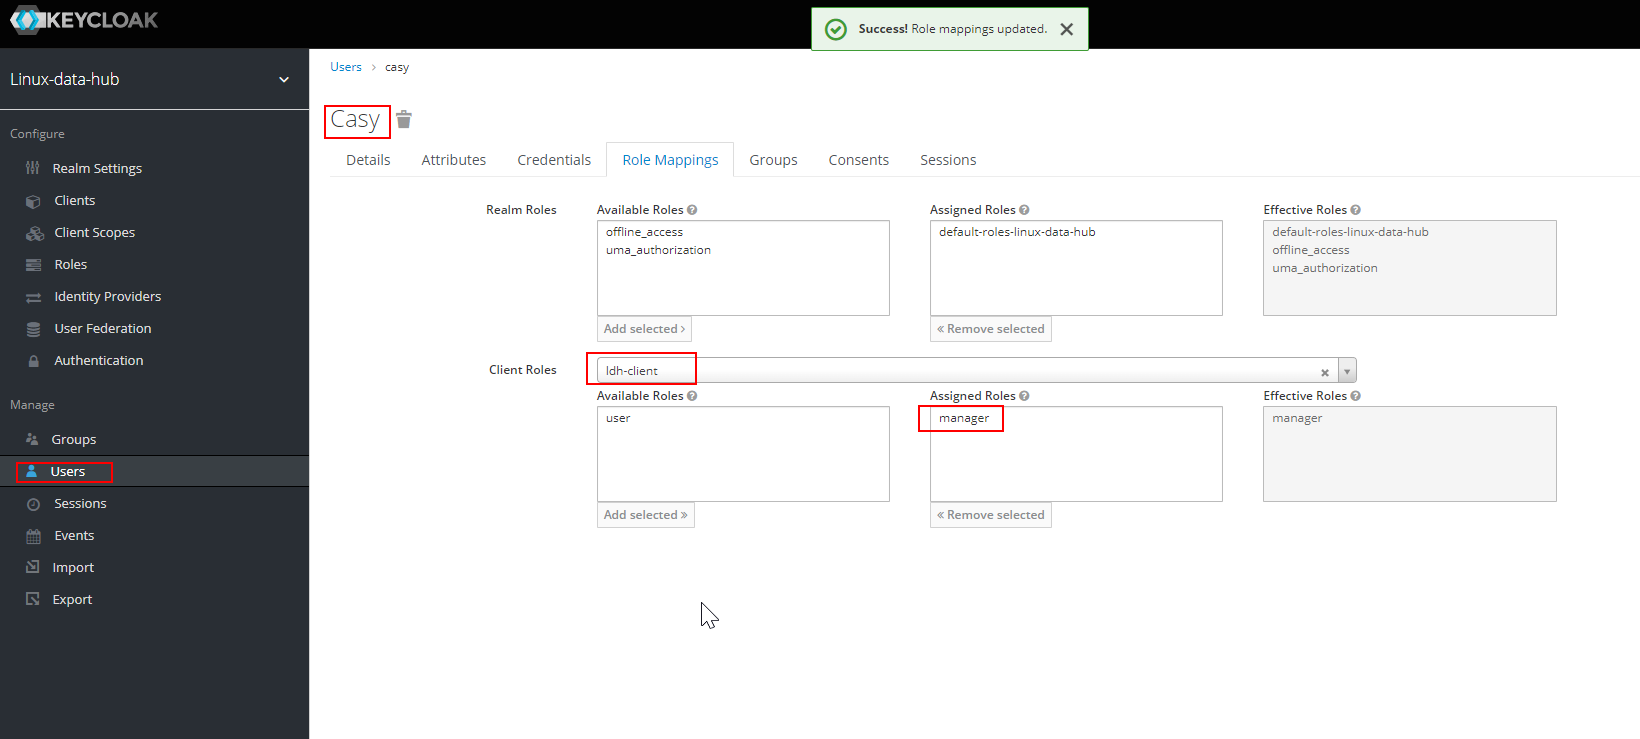
- Navigate to Realm (linux-datahub) → User → Select User (casy) → Role Mappings → Client Roles → (From Drop down) Select the client (ldh-client) → Assign manager Role
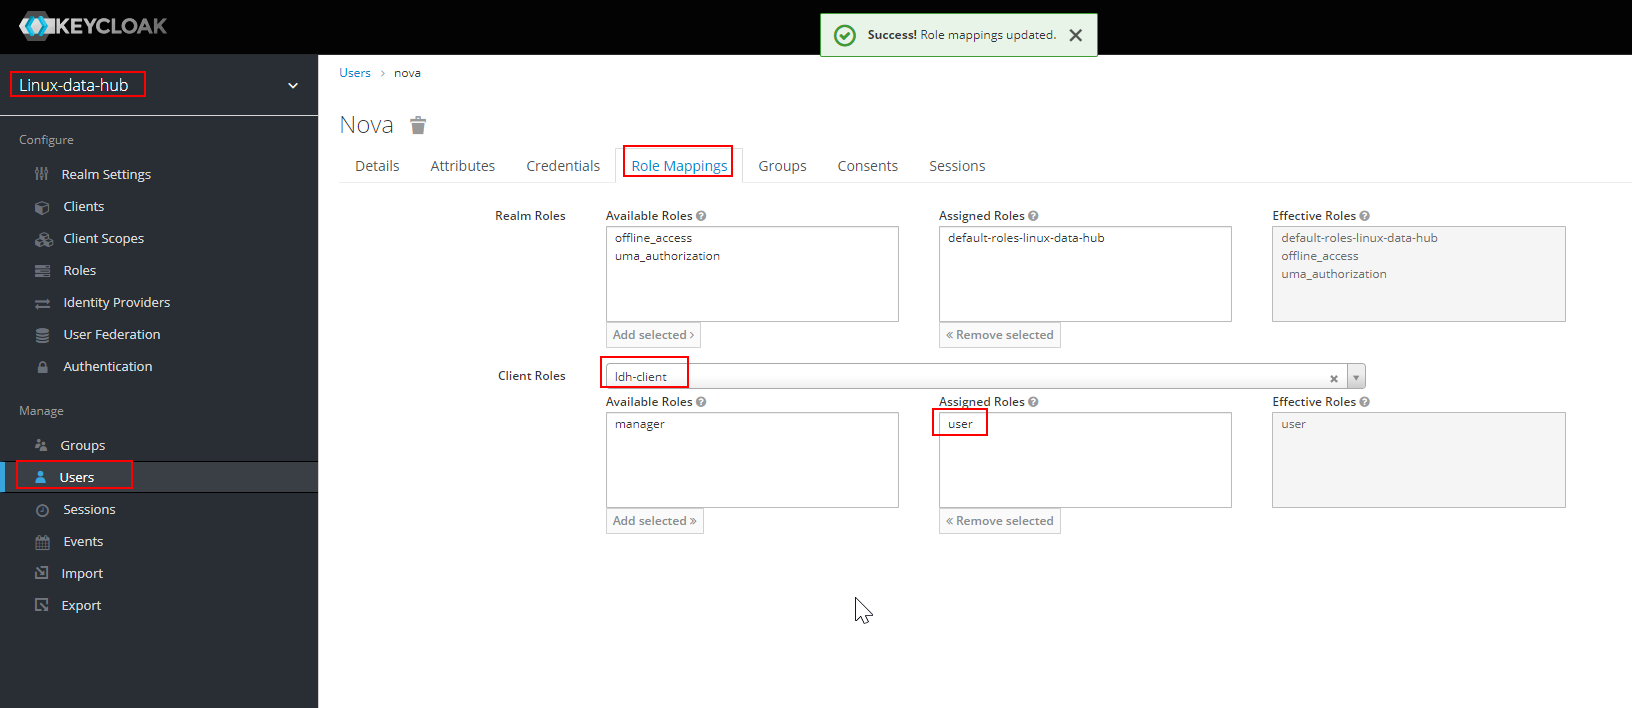
- Navigate to Realm (linux-datahub) → User → Select User (nova) → Role Mappings → Client Roles → (From Drop down) Select the client (ldh-client) → Assign user Role
Verify Access to Application
- Click on Manager Page in the Application home page, it will redirect to the keycloak GUI, where you can login with the users present in the realm
- To check the negative scenario, we will try to login with user nova, which is having role as user and will try to access the page which is only accessible by a user which have role manager
- We can see that, we will be getting permission denied for the user
- Lets try to login with user (casy) which have role as manager. It can be seen that the authentication and authorization succeeded
Conclusion
- From the Above example, I hope it is clear that the importance of the client and client roles is understood. Similarly we have another role, called Realm Role. But that is a topic for another discussion
- Thinking out of the box, Client Role is almost similar to groups of a user. Just like we give access to users which are part of a particular group, same is achieved with the Role Mapping for users
Reference
- ReactJS code is taken from public gitrepo maintained by motnip (Tomas Pinto)
- Medium.com Article written by Tomas Pinto





For newer generation of Keycloak, the ‘/auth’ in the “auth-server-url”: “http://localhost:8080/auth/” must be removed. That is, it should be like this, “auth-server-url”: “http://localhost:8080/”.
corrected. thanks.
This came beacuse im using an ingress controller to route my traffic , and the path for the same is /auth